Jewelry Retouching Techniques for Realistic Images in Budget
Jewelry is one of the hardest products to photograph and get them right. It's reflective, and often so small that while getting too close, you'll end up capturing something that is not so clear. Not only that but just how do you get a ring to “stand up in midair” or a necklace to float perfectly as it would on a person without a human in it? Jewelry has to shine and appear perfect to give the viewer a feeling of value. Here at SmartPHOTOeditors, we're experienced with all kinds of jewelry retouching to make your jewelry as perfect as possible. So, what are our image retouching techniques and how do we do it?
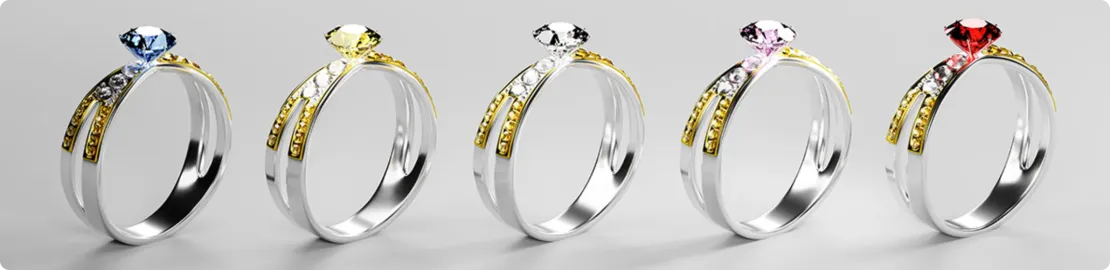
Adjust Color Balance
Have you ever noticed that gold isn't really “gold”? When photographing jewelry, the camera white balance may be perfect, but there still might be color casts, or the gold just doesn't appear “golden” enough. This is a simple but essential step that can be achieved by going to Image > Adjustments > Color Balance and then adjusting the sliders to make the image pop. This is a difficult adjustment, too much and the image looks fake, too little and the image won't pop, too far in any direction and your jewelry might end up looking green! Yikes! SmartPHOTOeditors have experience in this area, so you don't have to worry about that. If you're adjusting silver, you may want to go to the saturation tool and lower the saturation a little to get rid of any golden tones or color casts that may have happened after this.
-
Get Start Now!
- Contact Us
- Chat Us
- Email Us
- Call Us
Brightness/Contrast
Sometimes photographers will slightly underexpose an image to stop the detail in the highlights from getting blown out. The item may not seem clear or shiny if the picture is underexposed. There are many to do this, but the first step is to use the curves tool under Image>Adjustments>Curves. By raising the top part of the curve, the highlights get brighter. The process can also be done using an adjustment layer or simply by using the Brightness/Contrast tool under Image>Adjustments. Most professionals will use an adjustment layer because it maintains the original image just in case something goes wrong. To add a new layer use Layer,> New Adjustment Layer > Brightness/Contrast and then use the half black/white circle with that layer selected in the layers palette to adjust the sliders as necessary.
Un-sharp Mask
This is one of the more professional tools you might encounter; you want images not only to be in focus but to be sharp so that the fine details are clear, however, too much and your image becomes grainy and can get a noisy artifact that degrades it. Go to Filter > sharpen> Un-sharp Mask. There are three sliders in this tool which will sharpen (or un-sharpen) the image. The amount slider obviously determines how much the image should be sharpened between light and dark contrasting pixels, the threshold determines how much contrast and how intense colors will be, while the radius determines how large an area the tool selects to sharpen along those criteria.
Clipping or Cutting Out
Ever wondered how that background is just so white and pristine? Well, it's not there. Removing the background and creating a fake shadow allows the jewelry to be positioned perfectly and the focal point without any other distractions. This is tedious work and is best done with a graphics tablet so that you can use the pen tool to meticulously draw around and cut out the jewelry. Many items have delicate areas which cannot simply be clicked on and removed which is why SmartPHOTOeditors spend the time doing this, so you don't have to.
-
Get Start Now!
- Contact Us
- Chat Us
- Email Us
- Call Us
Adding Shadows
Shadows make an item look real. We know that the item floating on a white background has to be sitting on something because of physics, but most actual shadows will show the texture of whatever the item was sitting on, so they're created artificially. There are several image retouching techniques to do this depending on the shape of the item. The burn tool, elliptical tool, brush tool, or creating a duplicate layer and then turning down the exposure and opacity all make convincing shadows but requires experience and a lot of skill.
SmartPHOTOeditors with its skilled team of jewelry retouching editors has been offering image editing services for over a decade now. Contact us today to discuss your requirements and learn about our engagement model and pricing structure.
-
Get Start Now!
- Contact Us
- Chat Us
- Email Us
- Call Us
With SmartPHOTOeditors
Similar Articles