If you’ve shot with any modern point-and-shoot or even a smartphone camera lately, you’ve probably noticed the built-in panorama mode. And if you’ve tried it, you’ve probably noticed the results weren’t all that great—especially if you try to shoot a 360 degree panorama. Just like auto won’t get you the same results as manual mode, there’s no substitute for creating a high-resolution panorama from a DSLR.
While shooting a panorama with a DSLR may sound tricky, it’s actually not as hard as it sounds. Here’s a step-by-step guide on how to shoot a panorama with any DSLR.
What You Need
You can take a panorama with just a DSLR, lens and photo editing software, but there are a few other things that help make the process even simpler. For the best results, bring a:
- Tripod for easier panning, added sharpness and better results when stitching your photos together
- A remote release for even sharper photos without camera shake
- A zoom lens makes it easier to frame your shot when the scenery doesn’t allow you to zoom with your feet, but you can use any lens to create a panorama
Perhaps just as important as what you bring is what you should leave at home (or at least off your camera). Don’t use filters when shooting a panorama. While a clear filter is fine, if you use a polarizing filter, the sky will be a splotchy blue instead of one even color.
How to Shoot a Panorama with A DSLR
- Choose your scene
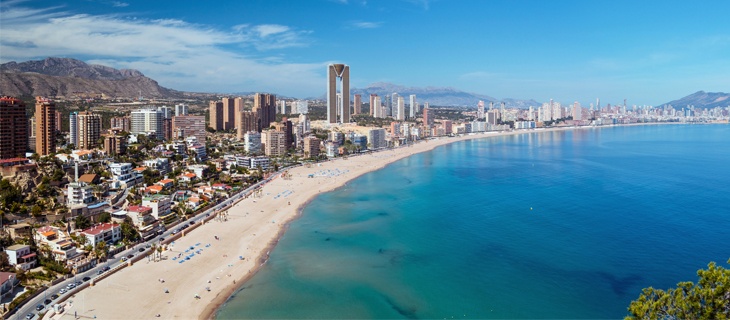
Panoramas are most often used to photograph wide, sweeping vistas. Start out by identifying what you would like to photograph. Note where you would like the photo to begin and end, and what distracting elements you’d like to leave out. Get a good picture in your mind of how you would like the photo to look, and where you would have to start and end the series of photographs to capture the entire view.
- Identify Common pitfalls
Once you have an idea of what you would like to include in your composition, make sure your shot avoids items that are fine in normal photos, but can create problems when stitching photos together.
A panorama cannot be used to photograph moving objects. If something in the scene moves in between the photos, the panorama won’t stitch together properly. But motion influences a panorama more than you may think. If your shot includes trees, grass or other plant life, a windy day may make it impossible to stitch photos together when the wind displaces the leaves. In the same way, you can’t create a panorama of a body of water when there are waves—but you can when the water is still.
Distance matters too. Objects in the foreground, or that are close to the camera, are more likely to get distorted when stitched together if you don’t have high-end panoramic equipment. You’ll get better results if you don’t include any foreground objects and instead photograph a view that’s more in the distance.
Once you’ve identified any potential pitfalls, adjust your composition if needed to eliminate motion and foreground elements.
- Adjust Your Camera Settings
To create a seamless panorama, your camera settings can’t change in between shots—that means manual mode is a must, as well as manual focus.
Turn your camera to manual mode. Don’t expose for the brightest or darkest areas of the scene, instead, choose an exposure that balances out the whole scene the best. To do that, use matrix or evaluative metering so that you can use the camera’s light meter as a guide.
Make sure that auto ISO is off and choose an ISO that best suits the scene (low for bright scenes and higher for dark scenes). Then, set the aperture. For a panorama, you’ll want to keep most of the scene sharp—that means you should use an aperture of at least f/8. Last, choose a shutter speed that balances out the exposure.
To prevent the focus from changing between shots, manual focus is a must. But, using manual focus for a panorama doesn’t have to be difficult. Use the autofocus to focus on a point in the distance. Once the focus is acquired, switch to manual focus to keep the focus the same for every shot.
Ideally, you should also shoot in RAW instead of JPEG to have the most control over editing your shots. But, if you haven’t shot in RAW before, try it out first on single shots and use JPEG for your panorama in the meantime.
- Set Up and Shoot
You can shoot a panorama with your camera in the horizontal or vertical orientation. Using the vertical orientation creates an image with a higher resolution, since you’ll need more photos to cover the same distance. But, stitching together fewer images is a bit easier than putting lots of photos together.
Whichever orientation you choose, set your camera up on a tripod—make sure it’s tightly fastened, level and that it pans easily. With the camera on manual and the autofocus off, start by photographing one end of the scene. Use a remote trigger if you have one so that you don’t introduce any camera shake. Check the image and make sure your exposure is accurate—if it isn’t adjust and reshoot that first image.
With your composition and end point in mind, pan the camera slightly and take another photograph. You’ll want to overlap each image, or make sure that a portion of the scene is captured in both images. If you are shooting with a vertical orientation, try to achieve about a 50 percent overlap—that means half of the second image was also in the first photo. If your camera is positioned horizontally, you don’t need to overlap quite so much, about thirty percent is good.
Continue taking images that overlap by 30 to 50 percent until you’ve captured the entire view that you want to include. Some scenes may need just two or three photos, while others may require dozens. Once you’ve captured all of the images, check them—make sure the focus and exposure looks even across each one and that there is a 30 to 50 percent overlap.
- Stitch them together
Now the tricky part—stitching. All those single images you shot need to be combined into one file in a way that looks as if you only took one photo in the first place. With the right software, stitching the photos together is much easier than it seems.
To create a panorama in Photoshop, head to File > Automate > Photomerge. A new Photomerge window will appear—use the “Browse” key to select the images that you took for the panorama. At the bottom, check mark “Blend Images Together” and “Geometric Distortion Correction.” Then, click ok. Photoshop will identify the overlap in your photos and stitch them together for you. Once the process is complete (which may take some time if you used a lot of photos), the image will open as a complete panorama and you can edit the photo as you would normally, including making any necessary crops.
There are also a few programs that focus solely on editing panoramas, but the concept is similar. Select the images you want to merge and the software will do the stitching for you. Popular alternatives to Photoshop for panoramas include Autopano and PTGui. If the task of stitching images together feels too daunting or too time consuming, Smart Photo Editors offers image stitching and panorama creation services.
That’s it—while creating a panorama with a DSLR certainly takes more time than snapping a single photo or using a smartphone app, the results are well worth the extra effort. Using a DSLR allows you to create high resolution panoramas to print or sell. Choose your scene and then make sure you don’t include any moving objects or foreground elements in the photos. Set your camera to manual mode and manual focus and put it up on a tripod. Shoot a series of photos in a row, overlapping each image by 30-50 percent. Then, stitch the images together using Photoshop or panorama software.
– SmartPHOTOeditors
SmartPHOTOeditors
 Prev
Prev