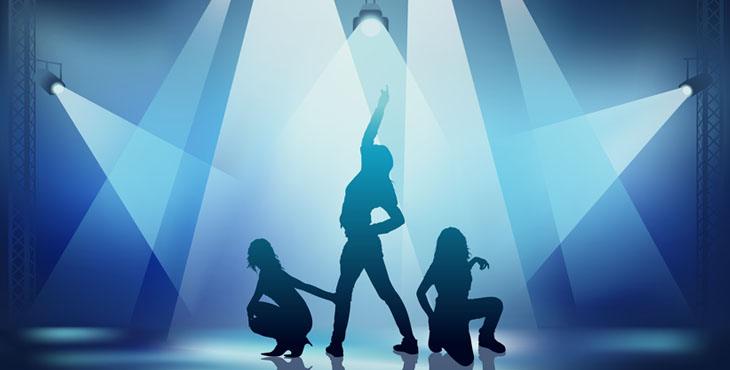
An image is a moment frozen in time—but often it’s the motion that’s trickiest to capture. So how do you represent an art form that’s constantly moving with just a still image? Toss in the typically dark conditions of a recital hall and it’s easy to see why dance photography is so difficult to master.
While one of the tougher subcategories of photography, dance photography isn’t impossible, and the challenge is met with an even greater sense of euphoria when you finally nail that shot. Here are nine dance photography tips that’ll get your photography moving and a grooving.

Shoot In Shutter Priority Mode
While manual allows the most control over your images, dance stages are typically not evenly lit, and dance photography doesn’t leave you much time to adjust settings. Instead, shoot in shutter priority mode so you can match your settings with the pace of the dance. The exact shutter speed will depend on the speed of the dancers, the available light, and the effect you’re looking for. A 1/60 shutter speed is typically slow enough to blur the swish of skirts but keep most of the action clear, but again, that depends on the type of dance. To really freeze the motion, bump up that shutter speed as high as you can without underexposing the image. It’s okay to use high ISOs, just base your decisions on how well your particular camera performs at high ISOs. Some cameras do fine at 6400, while others are best kept under 1600.
Use a Tripod
Dance photography is often shot with limited light, so a tripod comes in handy, or a monopod if you need to move more freely. The extra stabilization will come in handy for both freezing the action and incorporating different blur effects.
Master the Panning Technique
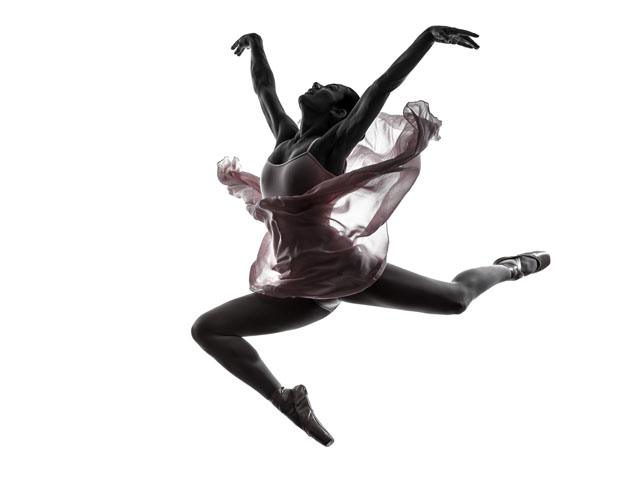
Sometimes, you want a crisp image, but photos perfectly frozen in time don’t often portray a sense of movement. While images at high shutter speeds certainly have their place in dance photography, you’ll want to learn how to use the panning technique as well. By moving your camera lens as the subject moves, you’ll wind up with a sharp subject with a blurred background, giving the image a sense of motion. You may need a slower shutter speed to get the desired amount of blur in the background; start at 1/60 and move up or down from there.
Experiment with Angles
If your dance photos are lacking a sense of drama, try shooting from a low angle. Also be sure to keep moving to capture different parts of the stage. Keep in mind you want faces in the images too—you may need to adjust your position to avoid getting the back of the dancer’s head.
Anticipate
Much like in sports photography, anticipation is the key when photographing dancers. If you can, go to multiple shows—you’ll be able to identify what angle did or didn’t work for what part of the show, and you’ll be better able to time the photo just right. If it’s a particular type of dancing, be sure to get acquainted with that style so you can better predict when to click the shutter.
Use Continuous Autofocus
Any time your subject is moving, and continuous focus is a good idea; otherwise, you’ll wind up with a lot of out-of-focus images. For dance photography, be sure to set the camera to continuous focus, so the autofocus system is adjusting with the dance. Of course, if you take portraits or group photos of the dancers after the show, be sure to switch it back to single focus to prevent errors and maintain battery life.
Become Friends with Burst Mode
While anticipation is the key while using burst mode, there’s only so much even the keenest photographer can anticipate. Using burst mode on the camera helps increase the chances that you caught the move at the right moment. For example, during a complete 360 degree twirl, burst mode will help ensure that there’s a shot showing the dancer’s face. You’ll wind up with some photos to delete later, but you’ll also have shots with much better timing.
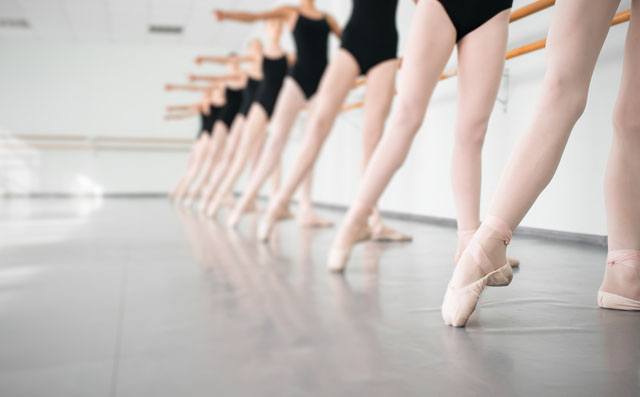
Capture both the Little Details, And the Big Picture
While it’s nice to have a photo or two of the entire stage, don’t be afraid to move in close to capture individual dancers. Heading in even closer, for example, taking just a picture of a ballerina’s feet en pointe, can create dramatic shots too. Pay attention to background elements too—while other dancers in the background can be a neat look, try to find an angle that keeps the background from being too busy. All of the elements in the frame tell a story—choose carefully what you include and what you leave out.
Invest In a Brighter Lens
Auditoriums typically aren’t very well lit—a lens with a wide aperture, f2.8 or lower, can be a big boost for photographing dances. Lenses with wide apertures are more expensive than their narrower counterparts, but they can make a dramatic difference and come in handy in other types of photoshoots too.
Conclusion: Dance Photography Is a Dance Itself
Between adjusting your camera settings, moving to find the best perspective and staying on your toes to capture the right moment, dance photography itself can start to feel like its own dance. Borrow some settings from sports photography—use a fast shutter speed to freeze the motion, or step it down a little to use panning or blur effects; and try to anticipate the next move. Burst mode and continuous autofocus settings are a must. Experiment with your angles, but capture a few close-ups as well as images of the entire stage. A tripod and a bright lens are a big help if you can afford them. Capturing dancers in motion is challenging, but your own heart may just get to dancing when you snap that perfect pose.
– SmartPHOTOeditors
SmartPHOTOeditors
 Prev
Prev