At first, real estate photography seems like a breeze. How hard could it be to shoot a couple of empty rooms? Quite challenging, actually… But the biggest problems in real state photography come from getting the lighting just right. Lighting is what’s going to make the space look warm and inviting or dark and dungeon-like. The right lighting will allow potential homebuyers to see the spectacular view out the window as well as the home’s interior in the same shot.
Many properties present a number of different challenges when it comes to lighting. Window light and the interior lights are often mismatched, which means overexposing that wonderful view outside the window into a white blob. The placement of interior lights on some properties can leave corners dark. Large rooms are tricky to get enough light into. And exterior shots have a number of different issues arising from shadows and the placement of the sun.
Real estate photography techniques are just as varied as the homes on the market. While one method may work great for a big living room with vaulted ceilings, the same trick probably won’t work well in the bathroom. Instead, mastering real estate photography is about having a number of tricks up your sleeve that can be pulled out and utilized to solve problems that each individual property presents. Here are five of those real estate photography lighting techniques, and when to use them.
Play With the Existing Light
The best architects will place the lighting fixtures in all the right places to highlight the features of the structure, though that’s certainly not always the case. The first step to lighting a real estate shot is to examine the light that’s already there. Start by turning on all the lights in the room. Does the light source present the room sufficiently, or are there dark spots? If there aren’t any dark spots, you can set up your tripod and get started shooting, though these well-lit rooms aren’t very common.
It’s also important to consider the existing light that’s coming in from the windows. Where are the windows located? Do the windows present a nice view that you want to highlight, or is the view not an important feature? If you want to include the view out the window, you’ll have to use one of the other lighting techniques below. But, if the view out the window is of a messy neighbor’s yard anyways, you can compose the shot to highlight the nice light that’s coming in, instead of the view. To do that, compose the shot so that the window is on a wall to your right or left, not directly in front of the shot. This will allow the sunlight to fall on the features in the room, and with the window to the side, it doesn’t matter that you can’t see the view outside.
When checking the existing light, look to see how it can be modified as well. Do the windows have shades or curtains? What happens if you turn lamps on or off? Some real estate photographers go through and replace all the bulbs in the room with tungsten bulbs. This can be time consuming, but it has a few different advantages. First, you are highlighting the lighting fixtures that are already there. Second, tungsten bulbs are more closely matched to the color temperature of the light coming through the windows, and they are also more powerful, so they will light more of the room without a flash.
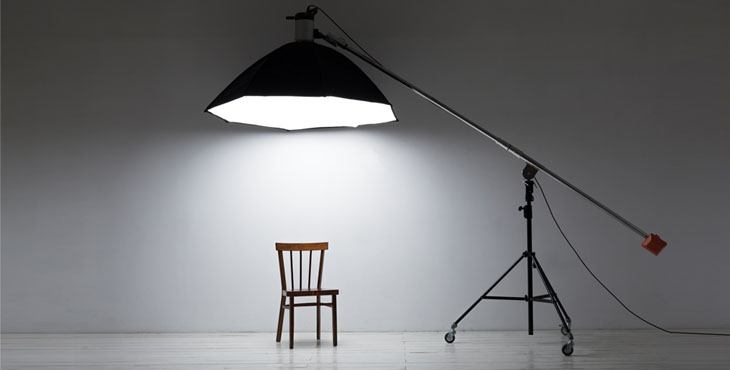
Use a Single, Bounced Fill Flash
In many cases, it’s easy to bounce a flash when shooting an interior. A single bounced flash will help fill in any shadows and it can also be used to highlight certain features. Bouncing the flash towards a high ceiling, for example, will draw the viewers’ eye to that feature of the home. Bounced flashes create softer light, so they don’t have that “flash photo look” to them.
Fill flash is a good technique for showing the view out the windows while still including a large portion of the room. To avoid overexposing the window, you’ll need to match the window light with the interior light. In some instances, a single flash is enough to do the trick.
Fill flash is also helpful for shooting exteriors. Using a hot shoe flash, you can direct the light towards the structure, highlighting the house instead of the landscaping. Of course, for some properties, you’ll want to show the landscaping. A flash can still be used to fill in shadows when directed over the entire shot, instead of just a portion.
A single fill flash is easy to set up. But, there are a few disadvantages. A single flash isn’t enough to light large rooms. Sometimes, the placement of furniture and fixtures requires multiple flashes to avoid shadows and dark spots. If the walls are a dark color, a bounced flash won’t work, and another flash modifier should be used instead.
Set Up Multiple Wireless Flashes
While using multiple flashes requires more set-up time and a larger initial expense, it’s the preferred method by many of the most well-known real estate photographers. Sometimes, setting up multiple wireless flashes is the only way to get a well-lit room in large spaces.
The exact set up is going to vary based on each individual property, but the idea is to light the room well, while highlighting the best features. Start by asking, what’s the best part of this room? Perhaps it’s high ceilings, beautiful moldings or a spectacular view out a large set of windows. Work your lighting set up around that feature. If the room has high ceilings, be sure to have some of the flashes bouncing up to the ceiling, highlighting those tall arcs. For the rooms with views, use multiple flashes to get enough power to expose the room and window light evenly so you can see out that window instead of getting an overexposed white window.
Along with highlighting the room’s best assets, look for shadowy areas and be sure to arrange your flashes so that the room’s lighting is even. For example, when photographing a kitchen, a flash hidden behind the island will help light the back portion of the image just as well as the front.
Get the Timing Right
The result of both your interior and exterior shots depends on the time of day that you shoot. Shooting interiors at dusk allows you to more easily match the interior light with the outdoor light, again, to avoid overexposing the windows.
Timing is big when it comes to exterior shots. Before you schedule the shoot, find out how the house is placed. If the sun is coming in from behind the home, either the house will appear dark, or you’ll have to overexpose the sky to get the proper exposure on the structure.
Shooting exteriors during the “magic hour” or the first twenty minutes or so after the sun has set also makes for dramatic photos. You’ll need a tripod (you should be using one anyway) and a longer shutter speed, but the cool blue hue often works well for real estate and you avoid the harsh shadows of the sun. Turn all of the lights on in the house for a dramatic look.
Try High Dynamic Range
Okay, so High Dynamic Range or HDR photography isn’t exactly a lighting technique, but it can help to solve some of the common lighting issues in real estate photography. High dynamic range, or taking several images at multiple exposures and combining them, can help solve unevenly lit rooms when it isn’t possible to use multiple flashes.
To use HDR, use the bracketing mode on your camera to take multiple photos at different exposures. The exact exposures will depend a bit on the scenario—but you should have at least one shot that exposes for the windows, and another exposed for the interior, and another one in between. The different exposures will be then combined in the real estate photography editing process.
HDR can be a good way to solve tricky problems, like unevenly light rooms. Flash is often the preferred option, but HDR can perform in many scenarios as well.
Conclusion: Mastering Real Estate Photography Techniques Is a Must for Taking Great Property Photos
Great lighting is an easy way to identify a professionally shot real estate photograph from the masses of amateur property photos. While lighting is one of the trickiest aspects to master, there are multiple techniques that can be combined to light each unique property. Start by analyzing the existing lighting, and how it could be simply manipulated by closing and opening blinds or putting in tungsten bulbs. A single, bounced fill flash can work for many rooms, while larger rooms require multiple wireless flashes strategically placed. Simply shooting at the right time of day is another strategy for getting that light just right. And if none of the other techniques offer a well-lit shot, high dynamic range can work for real estate photography too.
Getting the lighting just right may take some time and practice, but it’s the best way to capture great pictures that show homes in all their glory to bring in potential buyers and get that “SOLD” sign out front.
– SmartPHOTOeditors
SmartPHOTOeditors
 Prev
Prev